So, in my spinning wheel collecting adventures, I once bought, in total error, a wheel which was made only for display – NOT FOR SPINNING!
(without her flyer – presurgery)

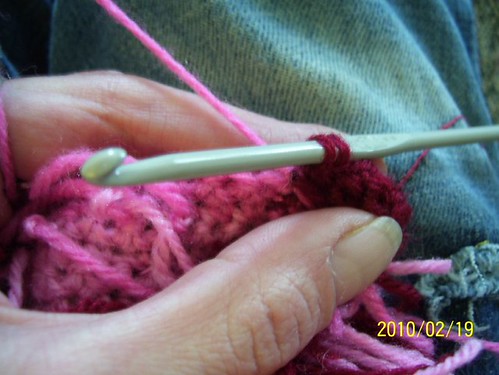
(her flyer/shaft and bobbin – the whorl is there somewhere too)

(another pic)

I know, ridiculous. Like a dresser who’s drawers don’t open, like a fridge without coolent, like a car that won’t drive. It boggles my mind how much fine wood and how much effort has gone into making these almost-wheels. And, they’re everywhere!
So, I did what I could. Nothing. Just looked at poor pathetic pinnochio in the corner, wondering what in the world she was good for. (my daughter seriously suggested the garden) I call her pinnochio because she really, really, REALLY wanted to be a real girl and spin!
So, in the interest of quieting pinnochio and satisfying my own curiousity and need-to-work-with-wood – I thought ‘Why Not?!’ and here are some pictures of what I’ve done and how she looks now….
I call it “The Pinnochio Project” 🙂
She came with a rough (really rough, not even rectangularly cut – an actual parralellagram) homemade flyer. The arms looked ok (so ok, I suspect they came from a REAL GIRL) and the centre (where it goes through the shaft) was very rough cut. The flyer shaft was seperated (or had never been attached) and had a huge hunk of sauter? or something where the orifice area was attached the straight shaft of the flyer. The shaft itself was threaded from the end past the whorl, up under the bobbin a ways (and not reverse threaded) so I presume they sautered an orifice shaped object onto a normal bolt or something like that, to create this flyer shaft. The orifice itself was very small, shallow and rough. Just a show orifice, not to really use. Ok, just a thought BUT – IF one is making something ‘for display’ then WHY the h*ll would they not make it display worthy?! As she was, Pinnochio was ashamed of being displayed!
(the tiny orifice)

(the hideous parallelagram shaped thing)

The bobbin was rough (as can be, not sure yet if that will really work well, ever) and it appeared that the original ‘display’ idea might have been that the bobbin and whorl were not made seperately but as one piece and someone in Pinnochio’s history had cut through them to make a seperate bobbin and whorl. (why, oh why, mysterious repairer, did you not notice the hideous state of the flyer?)
The wheel itself seems in excellent shape. I hesitate to say it’s well made, considering where it started but to my eyes, it looks good.
(the wheel)

The table, legs, mother of all – all good. The tensioner? NON EXISTANT. That’s the major idiocy of these wheels, if you ask me. The fact that someone did everything to make a spinning wheel and then bailed on creating a tensioning device. WHY? Something for the stupid files. Pinnochio had a fake medallion thingie to look like a screw tension but nothing that moved or worked.
So – to fix her. I decided to work on the flyer first. I sanded down the parallelagram. I sanded down the hunk of sauter around the orifice join as well. I did most of this with the favorite tool – the wood file. I love files! I also filed off all of the threads on the flyer shaft that I didn’t need and smoothed down the ones under the bobbin without totally removing them. (I didn’t want the flyer shaft to have a ‘small’ spot there). I used a nail file (best sandpaper in the house) to smooth a spot on the flyer arms where the bobbin rubs, to sort of widen the flyer a little at that spot and then used epoxy to attach flyer to shaft, once I had things sitting level and looking as pretty as possible. Pinnochio wants to be pretty….

The next thing was to figure out the best way to create an easy tensioning device. I decided on a tilt tension system (of course, with my current canadian production wheel obsessionn) using a u-bolt and a carved groove. Really, very simple! I thought about doing a screw tension (which would suit this little wheel better) but decided against the adventure of trying to figure out how to make or where to get screw boxes. I’m a simple girl – I work with simple tools!
I first removed the mother of all – had to take out stupid staples but at least it wasn’t glued or nailed), removed the medallion (with a putty knife I managed to loosen the glue on that piece), cut off the dowel, flush with the table (to keep the table bed kind of solid instead of having a random hole that I would have to fill or plug anyway) and then marked my groove and used my wood carving tools to chisel out a groove for the moa.


I bought a length of threaded rod at the hardware store and bent it into the U shape. This transpired because there are no suitable sized U bolts (or at least not that day, at that store) and the ones I saw were so clunky and thick that I though the rod was better anyways. I used a similar size table leg to bend the rod around, by hand, and then filed down the threads in the section that will show. Because the rod becomes very weak once all the threads are off (I know this from cutting through it with a file), I left a bit of them there. The roughness actually helps it grip the wood nicely and with a project like this – there is NO WRONG. Two wing nuts and two washers attach underneath the table to secure the U bolt and the MOA.

And, YAY! She spins. Not well, lol, but she does. I need to super grease her up and open up a little more space for the wheel axle in the uprights, to see what she can really do. The tensioner works perfectly!
And here are her ‘after’ shots…


I also need to trim the U bolt, underneath the table. Oh yes, and add a flyer hook nearer the beginning of the bobbin (and take one away at the end – I suspect these flyer arms and this bobbin ran away together since they certainly don’t really belong together)